If you’ve ever stood in a hardware store, staring at shelves lined with tiny tubs or squeeze bottles of abrasive compounds, wondering which one actually works for what you’re doing, you’re not alone. As a supplier of abrasive compounds, I get dozens of calls a week from folks who grabbed the first thing that looked right, only to find it scratched their car’s clear coat too hard, or left metal parts with a dull, uneven finish instead of the smooth, polished look they wanted. Choosing the right abrasive compound isn’t about grabbing the shiniest package or the one with the biggest label—it’s about matching three key things: what material you’re working on, the result you’re after, and how much elbow grease (or machine power) you’re willing to put in. Let’s break this down like we’re chatting over a coffee, no boring industry jargon promise. Abrasive Compounds

First, let’s talk about what abrasive compounds actually are, in plain terms. They’re not just “grit in a tub” (well, technically they are, but not the cheap stuff you’d use to scrub a grill). Every compound has two main parts: the abrasive particles (the sharp, hard bits that do the cutting) and a carrier (the goop that holds the particles, makes them spreadable, and keeps them from flying off mid-use). The trick is that abrasives come in different sizes, shapes, and materials, and the carrier can be wax-based, oil-based, or water-based—each for a specific job. I’ve seen guys use a heavy-duty metal compound on a delicate stainless steel watch part, end up ruining the finish, just because they didn’t pay attention to the grit size. That’s the mistake we’re fixing here.
Grit size is probably the most important number to nail down, but it’s also the most confusing. You’ll see numbers like 1200, 3000, even 12000, and most people think higher number = better result. Nah, not exactly. Grit size measures how big the abrasive particles are—lower numbers mean bigger, coarser particles, which do heavy cutting (like removing rust, deep scratches, or old paint). Higher numbers mean smaller, finer particles, which are for buffing, polishing, and getting that mirror-like shine. Let’s use a car example: if your hood has a deep scratch from a tree branch, you don’t grab a 10000-grit polish first. That’s like trying to cut down a tree with a butter knife. You’d start with a 500-grit compound to sand away the top layer of clear coat over the scratch, then move to 1500 to smooth the area, then 3000 to take out the light scratches from the 1500, then finally a high-grit polish to make it shine. Skip a step, and you’ll either waste time or scratch the surface worse.
But grit size isn’t the only grit-related thing—particle shape matters too. Most abrasive particles are angular, which is great for cutting because they dig into the material, but sometimes you want rounded particles, which are gentler. For example, if you’re polishing aluminum bike parts that have a machined finish (the smooth, slightly rough look from the factory), angular abrasive might leave tiny lines called “micro-scratches” that you can’t see until light hits it just right. Rounded particles roll over each other, so they smooth the surface without leaving those lines. I’ve had a customer call last month saying our metal compound was leaving weird streaks on his motorcycle handlebars—turns out he’d grabbed a compound with angular particles instead of the rounded one we offer for aluminum. That’s the kind of mix-up we help people avoid, no fancy tech support needed.
Next, the material you’re working on. This isn’t just “metal vs. plastic”—there are so many sub-types, and each reacts differently to abrasives. Let’s go through the most common ones I see:
Metals: Steel, aluminum, brass, copper, stainless steel. Steel is super hard, so you need a coarser, more rigid abrasive (like aluminum oxide, which is our go-to for heavy steel work). Aluminum is softer, so you need a finer abrasive, usually silicone carbide—if you use aluminum oxide on aluminum, it’ll leave behind particles that embed in the metal, and you’ll never get them out, leading to rust later. Brass and copper are even softer, so you need a polish with very fine particles, maybe even a rouge compound (yes, like the old theater makeup, but for metal) to get that bright, reflective shine. And stainless steel? Don’t skip the abrasive’s compatibility here—use a compound labeled for stainless, because the abrasive particles in other compounds can react with the stainless steel’s chromium content, leaving dull spots. I can’t tell you how many times someone’s tried to polish a stainless steel sink with a general-purpose compound, only to end up with discoloration.
Plastics and composites: Things like car bumpers, acrylic signs, polycarbonate windows. These are way softer than metals, so coarse abrasives will just melt or scratch them. For plastics, stick to very fine, mild abrasives—we have a water-based plastic compound that’s perfect for removing light scuffs from a headlight lens, without fogging the plastic. If you use a metal compound on a headlight, you’ll etch the surface permanently, and that’s a $500 part gone to waste.
Wood and wood finishes: Wait, abrasive compounds aren’t just for hard surfaces! If you’re refinishing a tabletop, a wood abrasive compound is for buffing out scratches in the finish, not sanding the wood itself. You want a compound with fine particles, usually wax-based, so it glides over the wood without clogging the grain. Avoid oil-based compounds here—they can leave a sticky residue that’s hard to sand or polish off later.
Then there’s the carrier type: wax-based, oil-based, or water-based. This is a detail that most people sleep on, but it makes a huge difference in how easy the compound is to use and how well it works. Wax-based compounds are great for finishing touches—they add a little protection while you polish, so you can kill two birds with one stone. The downside? They can leave a wax buildup if you use too much, so you have to buff it off extra well. Oil-based compounds are more durable, cut faster, and work better on heavy jobs like removing old paint from metal. But they’re messier, harder to clean up, and can stain light-colored materials if you’re not careful. Water-based compounds are the new kid on the block, and for good reason—they’re low-mess, easy to clean with just soap and water, don’t have harsh fumes, and work great for most light to medium jobs. We sell way more water-based compounds now than we did 5 years ago, because people don’t want to deal with the sticky, smelly oil stuff anymore.
Let’s talk about how you’re using the compound too—are you doing it by hand, or with a machine? If you’re buffing a small part by hand, you can use a slightly coarser compound, because you control the pressure. But if you’re using a rotary buffer or a random orbital sander (the kind most people use for car detailing), you need a milder compound, because the machine does most of the work and can easily burn through the material or leave swirl marks. A lot of new detailers grab a heavy-duty cutting compound and run it with a rotary buffer, and within 10 minutes, they’ve ruined the clear coat. Pro tip: if you’re using a machine, stick to compounds labeled “polish” instead of “cutting compound” for light jobs, and only use cutting compound if you absolutely have to. I always tell people to test a small, hidden area first—like under the car’s bumper or on the back of a wooden table—to make sure the compound doesn’t damage the surface.
Another thing to consider: contamination. If the surface you’re working on has rust, paint, or grease, you can’t just put the compound on top of it. You have to clean the surface first, otherwise the abrasive particles will get clogged with the gunk and won’t work. I once had a customer bring in a rusted metal fence, ready to use a coarse compound, and when we asked if he’d cleaned the rust off first, he said “well, that’s why the compound is there!” Spoiler: the compound just slid over the rust, and he ended up having to sand the whole fence by hand anyway. Always wipe down the surface with a degreaser first, and for rust, use a wire brush or sandpaper to remove the loose rust before applying the abrasive compound.
Wait, let’s clear up a common myth: more expensive isn’t always better. I’ve had people pay twice as much for a “professional grade” compound, only to find that a mid-priced one works just as well, if not better, for their job. The key is matching the product to the task, not the price tag. That said, cheap off-brand compounds from the dollar store might have inconsistent grit sizes—you could get a tub where half the particles are 3000-grit and half are 1000-grit, which will leave uneven scratches. So you don’t have to splurge, but stick to reputable brands that test their grit sizes. As a supplier, we test every batch of our compounds to make sure the grit is consistent, so you don’t have to worry about that.
Let’s put this all together with a real example, so it’s not just theory. Say you have a pair of brass candlesticks that are dull and have a few light tarnish spots, and you want to polish them to a bright shine. Here’s what to do: first, the material is brass, so you need a fine abrasive, usually a rouge compound (12000-grit or higher). You can use a hand-applied wax-based polish, because you want to avoid mess, and since it’s a small item, hand application is easy. If the tarnish is deep, you’d first use a 600-grit brass compound (coarser) to remove the heavy tarnish, then move to the rouge. If you tried to use a coarse steel compound on brass, you’d either scratch the brass or leave embedded steel particles that will rust and ruin the candlesticks. If you tried to use a wax-based rouge on a deep tarnish, it’d take forever, and you might not get all the tarnish out. That’s the balance we’re talking about.
Another example: a car’s front bumper that has a few small rock chips and a light foggy clear coat. You want to fix that without repainting. Start with a 300-grit cutting compound (for use with a random orbital buffer—never use a rotary buffer here, you’ll burn through the clear coat) to smooth the rock chips and the foggy area. Then use a 1500-grit polish to remove the swirl marks from the cutting compound. Then finish with a 5000-grit polishing compound to get that smooth, shiny look. If you skipped the 300-grit and went straight to 1500, you’d never get the rock chips to smooth out properly. If you used a wax-based compound for the cutting step, the wax would make it harder for the abrasive particles to cut, so you’d waste twice as much time.
Now, I know this sounds like a lot to keep track of, and it can be overwhelming when you’re in the store or scrolling online, trying to pick the right one. That’s why we’re here—we don’t just sell compounds, we help people figure out what they need. If you’re not sure, just send us a note or give us a call, tell us what material you’re working on, what result you want, and how you’re applying it, and we’ll point you to the right product. No sales pitch, no pressure to buy something you don’t need. We’ve been doing this for years, and we’ve helped thousands of people avoid the mistakes I mentioned earlier—wasted money, ruined parts, hours of frustration.
Before I wrap up, let’s list a few quick checkpoints to make sure you’re making the right choice, so you can have this guide handy next time you need a compound:
- What material is your surface? (Metal, plastic, wood, etc.)
- Do you need heavy cutting (removing scratches, rust, old finish) or just light polishing (adding shine, removing light scuffs)?
- Are you applying it by hand or with a machine?
- Do you care about mess (oil-based vs. water-based) or adding protection (wax-based)?
If you can answer those four questions, you’ll never grab the wrong compound again. I’ve seen too many people struggle with this, but once you get the hang of it, it’s way simpler than it seems.
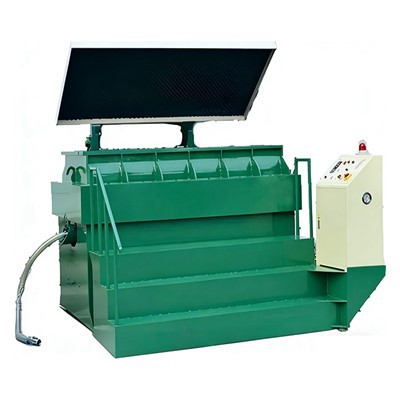
Now, if you’ve got a project coming up, or you’re tired of messing around with compounds that don’t work, reach out to us to chat through what you need. We’re here to help you get the job done right, no hoops to jump through. Whether you’re a hobbyist working on a weekend project or a professional detailer needing consistent compounds for a big job, we’ve got you covered.
Magnetic Polishing Machine references
- American Society for Testing and Materials. (2021). Standard Test Method for Grit Size Measurement of Abrasive Compounds. ASTM International.
- Metal Finishing Suppliers Association. (2022). Guide to Abrasive Compound Selection for Metal Surface Preparation. MFSA Technical Bulletin No. 12.
- Woodworking Network. (2023). Best Practices for Using Abrasive Compounds on Wood Finishes. Woodworking Industry Best Practices Series.
- Plastics Industry Association. (2022). Compatibility Guide for Abrasive Compounds on Thermoplastic Surfaces. PIA Technical Report TR-47.
Dongguan Xindingsheng Intelligent Grinding Technology Co., Ltd.
Dongguan Xindingsheng Intelligent Grinding Technology Co., Ltd. is one of the most reliable abrasive compounds manufacturers and suppliers in China, also supports customized service. Please feel free to wholesale bulk high quality abrasive compounds in stock here from our factory. Contact us for pricelist.
Address: Room 101, Building 1, No. 73 Dahuangmei Road, Dalingshan Town, Dongguan City, Guangdong Province, China
E-mail: cndskj@126.com
WebSite: https://www.xdsfinishing.com/
